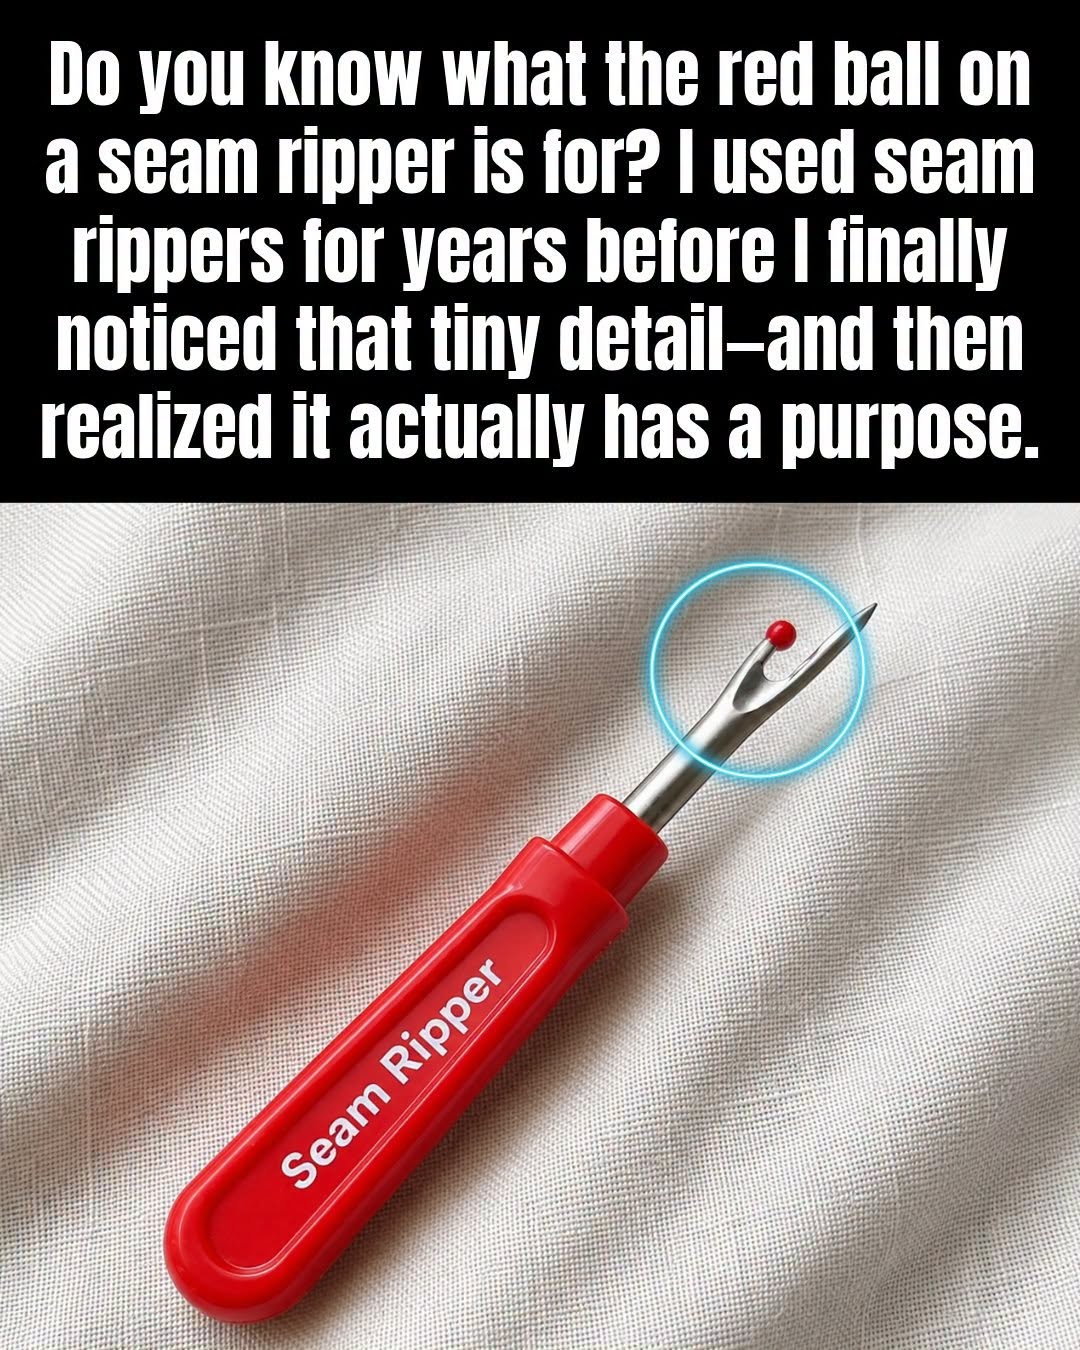
Let me tell you about the first time I truly understood the magic of a seam ripper.
SeamRippers
I was in my late twenties, sitting at my kitchen table, trying to alter a beloved vintage skirt. I was using tiny, sharp scissors, squinting under the light, and accidentally snipping the actual fabric. I was frustrated, feeling like I was ruining something I loved and that I just didn’t have the patience for sewing.
Then my grandmother walked by, saw my struggle, and gently placed a small, red-capped tool in my hand. “Let me show you,” she said. She demonstrated how to slide it under the thread, and with a satisfying little snip, the seam gave way without a single tear to the fabric. It was a game-changer. It transformed a frustrating, anxiety-inducing chore into a mindful, almost meditative practice.
If you have ever dreaded the prospect of having to undo a seam, or if you’ve accidentally poked a hole in your favorite fabric while trying to remove stitches, take a slow, deep breath. You are not alone, and you are not doing it wrong—you just need to learn the gentle rhythm of this little tool. Let’s explore how to properly use a seam ripper, step by step.
What Is a Seam Ripper? (And Why We Love It)
A seam ripper is a small but mighty sewing tool designed for the precise, safe removal of stitches. It is an absolute must-have for any sewist, tailor, or maker. Unlike scissors, which can be clumsy and dangerous to your fabric, a seam ripper is engineered to do exactly one thing: cut thread without cutting cloth.
The Anatomy of a Seam Ripper
Understanding your tool is the first step to using it beautifully. If you look closely at the end of the handle, you will see three distinct parts:
The Anatomy of a Seam Ripper
Understanding your tool is the first step to using it beautifully. If you look closely at the end of the handle, you will see three distinct parts:
- The Handle: A comfortable, often rounded grip that gives you control.
- The Pointed Tip: A sharp, spear-like point used for piercing and lifting threads.
- The Curved Blade: A small, razor-sharp, concave blade nestled in the middle that actually does the cutting.
- The Red Ball (The Secret Weapon): A tiny, smooth ball on the opposite side of the blade. This is your safety feature! It is designed to slide under the thread and over the fabric, ensuring the blade only cuts the thread and never your precious material.
How to Use a Seam Ripper Properly
Using a seam ripper correctly turns a tedious task into a smooth, satisfying process. Here is the gentle, step-by-step method my grandmother taught me.
Step 1: Identify the Stitch and the “Right” Side
Look closely at the seam you want to remove. You will notice that the stitches look slightly different on the top (right side) and the bottom (wrong side) of the fabric. Gentle Tip: It is almost always easier and safer to cut the stitches from the underside (the bobbin thread side).
The threads on the underside are usually looser and easier to slide the tool under.
Step 2: The “Red Ball” Technique
This is where the magic happens. Take your seam ripper and slide the red ball under the thread you want to cut.
Let the ball glide along the fabric. Because the ball is slightly raised, it lifts the thread up and directly into the path of the curved blade.
Step 3: The Gentle Push and Snip
Once the thread is resting in the curve of the blade, gently push the tool forward.
You will feel and hear a tiny, satisfying snip. The blade cuts the thread, and the red ball ensures your fabric remains completely safe.
Step 4: Work in Sections (Don’t Cut Every Stitch!)
You do not need to cut every single stitch. Cut every third or fourth stitch along a two-inch section.
Once you have cut a few threads, simply pull the long, uncut thread from the other side of the fabric. It will slide right out! This saves time and prevents the fabric from puckering.
Step 5: Clean Up the Snippets
Once the seam is open, you will be left with tiny, stubborn bits of thread.
Do not pick at them with your fingernails.
Simply take a piece of masking tape or packing tape, wrap it around your hand sticky-side out, and gently dab the fabric. The tape will lift away every tiny thread snippet in seconds.
A Quick Guide to Seam Ripping Success
|
The Step
|
The Secret to Success
|
The Gentle Tip
|
|---|---|---|
|
The Red Ball
|
Let it do the heavy lifting.
|
Always slide the ball under the thread. It acts as a shield between the blade and your fabric.
|
|
Cutting Frequency
|
Cut every 3rd or 4th stitch.
|
Cutting too many stitches at once can cause the fabric to pucker and make the thread hard to pull.
|
|
The Direction
|
Always push away from you.
|
For safety and control, push the tool forward, away from your body and your free hand.
|
|
The Cleanup
|
Use sticky tape.
|
A gentle dab with masking tape is the fastest, most resourceful way to remove tiny thread bits.
|
A Compassionate Closing Thought
If you are reading this and feeling a sense of dread because you have to rip out a seam you just spent an hour sewing, please take a slow, deep breath and offer yourself a moment of profound grace.
Unpicking is not failing; it is refining. We often view having to rip out stitches as a punishment or a mistake.
But in the world of sewing, unpicking is simply “editing.” It is how we perfect our craft, ensure a beautiful fit, and learn from our techniques.
It is a vital, honorable part of the process.
Patience is a quiet practice. Ripping seams cannot be rushed. Allow this time to be a mindful break.
Patience is a quiet practice. Ripping seams cannot be rushed. Allow this time to be a mindful break.
Listen to a podcast, put on some soft music, and let the rhythmic snip-snip-snip be a meditative pause in your day.
The right tool brings peace. Learning to use a seam ripper properly removes the anxiety of ruining your fabric.
The right tool brings peace. Learning to use a seam ripper properly removes the anxiety of ruining your fabric.
When you trust your tool, you can relax your hands and your mind.
Give yourself grace for the backward seams.
Give yourself grace for the backward seams.
Every single sewist, from beginners to master tailors, has sewn a seam backward or attached a piece upside down. It is a universal rite of passage. Laugh about it, grab your seam ripper, and try again.
That little red-capped tool isn’t just for fixing mistakes.
It is a gentle guide to better craftsmanship.
It is a protector of your beautiful fabrics.
And it is a reminder that every great project is built on patience, practice, and the willingness to try again.
It is a protector of your beautiful fabrics.
And it is a reminder that every great project is built on patience, practice, and the willingness to try again.
So, the next time you need to undo a seam…
Slide the red ball gently underneath.
Listen for that satisfying little snip.
And enjoy the peaceful, mindful art of unpicking.
Listen for that satisfying little snip.
And enjoy the peaceful, mindful art of unpicking.
What is your favorite sewing notion or tool that completely changed your crafting experience? Do you have a gentle, resourceful trick for making tedious sewing tasks a little more enjoyable? Share your practical wisdom and cozy crafting memories respectfully in the comments below.